ultralytics版のSAMでゼロショットセグメンテーションに挑戦
Meta社が開発したSegmentation Anything Model(SAM)は、画像内のオブジェクトを自動で認識し、ゼロショットでのセグメンテーションが可能です。このモデルは、YOLOで有名なUltralyticsのライブラリでもサポートされています。本記事では、Ultralytics版SAMの具体的な使い方について詳しく解説します。Meta版も別記事で紹介していますのでそちらも参考にしてください。

Segment Anything Model(ultralytics版)とは
YOLOv8のライブラリでは、SAMのモデルも使えるようになっているようです。
今回は、YOLOv8のライブラリにあるSAMを利用してゼロショットのセグメンテーションを行ってみました。
公式の解説: UltralyticsのSegment Anyting Model(SAM)
実際に使ってみてわかりましたがMetaのSAMと挙動は異なります。YOLOベースになっているのが理由だと思います。
Google Colabで動作するコードをこちら(Github)に用意しました
前準備
インストール
ライブラリはpipでインストール可能です。Google Colabの場合は、!を先頭につけます。
pip install ultralytics用意されているモデル
用意されているモデルは、sam_h, sam_l, sam_b, mobile_samの4種類です
それぞれ、事前学習モデルの’sam_h.pt’, ‘sam_l.pt’, ‘sam_b.pt’, ‘mobile_sam.pt’を利用します。

事前学習モデルは実行時に自動的にダウンロードされます
ヘルパー関数
以下、ヘルパー関数の定義です。こちらの記事と同じものです。

import numpy as np
import torch
import matplotlib.pyplot as plt
import cv2

def show_mask(mask, ax, random_color=False):
    if random_color:
        color = np.concatenate([np.random.random(3), np.array([0.6])], axis=0)
    else:
        color = np.array([30/255, 144/255, 255/255, 0.6])
    h, w = mask.shape[-2:]
    mask_image = mask.reshape(h, w, 1) * color.reshape(1, 1, -1)
    ax.imshow(mask_image)

def show_points(coords, labels, ax, marker_size=375):
    pos_points = coords[labels==1]
    neg_points = coords[labels==0]
    ax.scatter(pos_points[:, 0], pos_points[:, 1], color='green', marker='*', s=marker_size, edgecolor='white', linewidth=1.25)
    ax.scatter(neg_points[:, 0], neg_points[:, 1], color='red', marker='*', s=marker_size, edgecolor='white', linewidth=1.25)

def show_box(box, ax):
    x0, y0 = box[0], box[1]
    w, h = box[2] - box[0], box[3] - box[1]
    ax.add_patch(plt.Rectangle((x0, y0), w, h, edgecolor='green', facecolor=(0,0,0,0), lw=2))
画像の読み込み
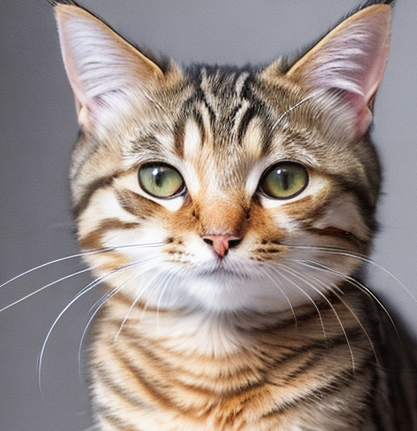
画像を読み込みます。今回利用したcat2.pngは、こちらからダウンロードできます。Google Colabの場合は、以下のコードを実行してください。
!wget -O cat2.png https://github.com/aruaru0/SAM-TEST/blob/main/cat2.png?raw=true 以下のコードを実行すると、画像が読み込まれ表示されます。
image = cv2.imread('cat2.png')
image = cv2.cvtColor(image, cv2.COLOR_BGR2RGB)
plt.figure(figsize=(5,5))
plt.imshow(image)
plt.axis('on')
plt.show()
モデルの読み込み
モデルを読み込みます。以下の説明では、ここで読み込んだモデルを利用します
from ultralytics import SAM

model = SAM('sam_b.pt')

model.info()
場所を指定してセグメンテーション
POINT(点)指定(場所指定)
画像中の1箇所の点を指定して、セグメンテーションする例です。
座標の指定は以下のように行います(指定した点も画像に重畳して表示します)
input_point = np.array([[200, 200]])
input_label = np.array([1])

plt.figure(figsize=(5,5))
plt.imshow(image)
show_points(input_point, input_label, plt.gca())
plt.axis('on')
plt.show()
予測するコードは以下になります。plt部分は表示ですので、pointsとlabelを指定して呼び出すだけです。
results = model(image, points=input_point, labels=input_label)[0]

plt.figure(figsize=(5,5))
plt.imshow(image)
show_mask(results.masks.data[0].cpu(), plt.gca())
show_points(input_point, input_label, plt.gca())
plt.axis('off')
plt.show()結果を見ると、狙い通り「猫」がセグメンテーションされました。

複数POINT(点)指定
複数の点を指定することも可能です。
input_point = np.array([[200, 200], [400, 500]])
input_label = np.array([1, 1])

plt.figure(figsize=(5,5))
plt.imshow(image)
show_points(input_point, input_label, plt.gca())
plt.axis('on')
plt.show()
results = model(image, points=input_point, labels=input_label)[0]
for mask in results.masks:
  plt.figure(figsize=(5,5))
  plt.imshow(image)
  show_mask(mask.data[0].cpu(), plt.gca())
  show_points(input_point, input_label, plt.gca())
  plt.axis('off')
  plt.show()
結果は以下になります。テーブルの部分は、全体を期待しましたが半分しかセグメンテーションされませんでした。


MetaのSAMでは、labelsに0を設定することで除外設定できましたが、うまく動きませんでした。やり方が違うのかもしれません。
BBOX(枠)指定(矩形指定)
矩形を指定して、枠内をセグメンテーションすることも可能です。以下はコードです。
矩形は(x0, y0, x1, y1)の座標指定により行います。
input_box = np.array([0, 250, 200, 768])
results = model(image, bboxes=input_box)[0]
for mask in results.masks:
  plt.figure(figsize=(5,5))
  plt.imshow(image)
  show_mask(mask.data[0].cpu(), plt.gca())
  show_box(input_box, plt.gca())
  plt.axis('off')
  plt.show()
複数のBBOX(枠)指定(矩形指定)
枠も複数指定することが可能です
input_boxes = torch.tensor([
    [0, 250, 150, 600],
    [50, 50, 400, 650],
    [80, 550, 512, 768]
],)

results = model(image, bboxes=input_boxes)[0]
for mask, input_box in zip(results.masks, input_boxes):
  plt.figure(figsize=(5,5))
  plt.imshow(image)
  show_mask(mask.data[0].cpu(), plt.gca())
  show_box(input_box, plt.gca())
  plt.axis('off')
  plt.show()
複数の枠を指定した場合は、それぞれの枠に対して個別にセグメンテーションの結果が出力されました。


Predictorを使う
ultralyticsのSAMでは、Predictorを先に設定してから、処理するモデルで利用することも可能です。以下は、Predictorを使う例です。
from ultralytics.models.sam import Predictor as SAMPredictor

# Create SAMPredictor
overrides = dict(conf=0.25, task='segment', mode='predict', imgsz=1024, model="mobile_sam.pt")
predictor = SAMPredictor(overrides=overrides)

# Set image
predictor.set_image("cat2.png")  # set with image file
results = predictor(bboxes=[50, 50, 400, 650])[0]

for mask in results.masks:
  plt.figure(figsize=(5,5))
  plt.imshow(image)
  show_mask(mask.data[0].cpu(), plt.gca())
  plt.axis('off')
  plt.show()
Predictorのメリットが、まだわかっていませんが、実際につかうと便利なんだろうと思います。
画像全体を自動的にセグメンテーション
SAMでは、画像全体を自動的にセグメンテーションさせることもできます。ここでは、画像全体のセグメンテーションを行ってみます。
セグメンテーションを実行
全体へのセグメンテーションは以下のようにPredictorを使って行います(公式サンプル通り)。
predictor(source=image, crop_n_layers=1, points_stride=64)[0]の部分で処理を行っていますが、自動セグメンテーションはかなり重く感じました。

Meta社のSAMより、時間がかかりました。かなり違うので、使い方の問題かもしれません。
from ultralytics.models.sam import Predictor as SAMPredictor

# Create SAMPredictor
overrides = dict(conf=0.25, task='segment', mode='predict', imgsz=1024, model="sam_b.pt")
predictor = SAMPredictor(overrides=overrides)

# Segment with additional args
results = predictor(source=image, crop_n_layers=1, points_stride=64)[0]
以下は結果を表示するプログラムです。
from torchvision.utils import draw_segmentation_masks

n = len(results.masks)
m = 3

flg, axes = plt.subplots(nrows = (n+m//2)//m, ncols = m, tight_layout=True, figsize=(3*m, 2*(n+m//2)//m))

for i in range(len(results.masks)) :
  img = torch.tensor(image).permute(2,0,1)
  mask =  results.masks[i].data[0].cpu()
  x = draw_segmentation_masks(img, mask, colors="yellow")

  axes[i//m, i%m].imshow(x.permute(1,2,0))
  axes[i//m, i%m].set(xticklabels=[], yticklabels=[], xticks=[], yticks=[])

plt.show()結果を見ると、33個のセグメントを見つけたようです。points_stride=64が小さすぎるのかもしれません。

aut-annotate
公式を見るとauto-annotateという機能もあるようです。
from ultralytics.data.annotator import auto_annotate

auto_annotate(data="cat2.png", det_model="yolov8x.pt", sam_model='sam_b.pt')
実際に使うと以下のような結果が返ってきました。
猫1、椅子1、本1ということで、だいたい正解しているようです。ただ、戻り値もないのでどのように使うのか悩みどころです。

まとめ
以上、Ultralytics社のSAMについて解説しました。
YOLOv8による物体検出だけでなく、セグメンテーション、ゼロショットセグメンテーション、ポーズ推定とかなり幅広くサポートしてきていることがわかりました。
