LMStudio APIを試す|Go言語でローカルLLMを呼び出す方法
Aru
Aru's テクログ(Aruaru0)

YOLO(YOLOv8など)の結果を可視化するためだけにコードをわざわざ書くのは手間がかかります。raboflow/supervionライブラリを利用すれば、検出枠やセグメンテーションの結果を簡単にビジュアル表示させることが可能です。この記事では、YOLOv8の結果をsupervisonを使って可視化する方法について解説します。
supervisonは、オープンソースのコンピュータビジョン用のツールになります。機能的には、物体検出やセグメンテーションの予測結果を簡単にビジュアル表示させるツールです。
YOLOでは、物体検出の場合は枠情報が結果として返ってきます。どこに検出枠があるのかを視覚的に確認したい場合は、画像に枠を重畳させて表示するかと思います。コード自体、そこまで大変ではないですが、ちょっと確認するだけなのにコードを作成するのは面倒です。
このような場合に、supervisonは便利です。
Github:https://github.com/roboflow/supervision
今回は、YOLOv8と組み合わせて利用してみます。
とりあえず、YOLOv8とsupervisionのインストールはどちらもpipで行えます。以下、両者をインストールするコマンドです。
pip install ultralytics
pip install supervisionまずは、物体検出タスクでsupervisonを使ってビジュアル表示させてみます。
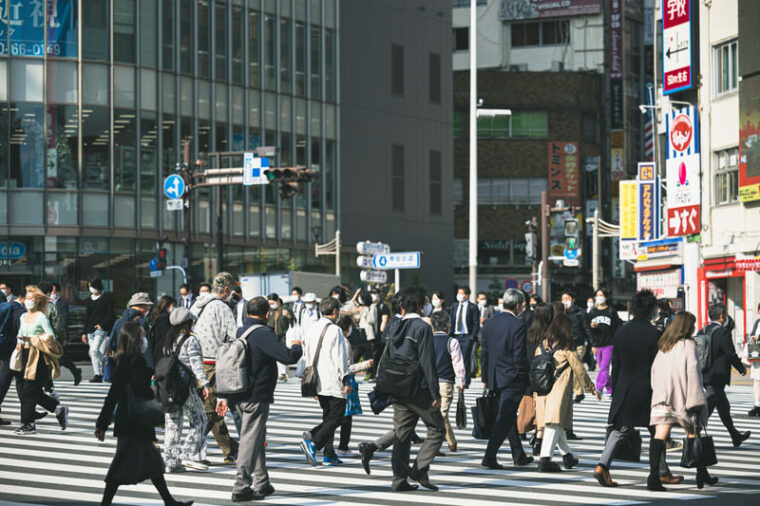
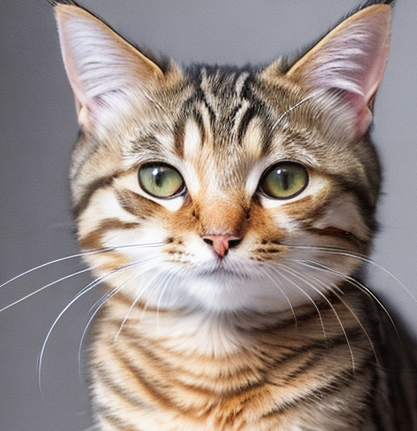
最初にYOLOv8で物体検出を行います。ここでは、以下の画像を利用しました。
import cv2
from ultralytics import YOLO
import supervision as sv


model = YOLO("yolov8n.pt")
image = cv2.imread("image.jpg")
results = model(image)[0]0: 448x640 16 persons, 1 traffic light, 1 backpack, 5 handbags, 1 suitcase, 10.2ms
Speed: 3.5ms preprocess, 10.2ms inference, 1.8ms postprocess per image at shape (1, 3, 448, 640)人物を16人(16 persions)、信号機、バックパック、ハンドバックを5つ、スーツケースを見つけたようです。
これを、supervisonを用いて可視化してみます。
detections = sv.Detections.from_ultralytics(results)

bounding_box_annotator = sv.BoundingBoxAnnotator()
label_annotator = sv.LabelAnnotator()

labels = [
    results.names[class_id]
    for class_id
    in detections.class_id
]

annotated_image = bounding_box_annotator.annotate(
    scene=image, detections=detections)
annotated_image = label_annotator.annotate(
    scene=annotated_image, detections=detections, labels=labels)

sv.plot_image(annotated_image)
以下は結果の画像です。
いい感じに可視化できていると思います。BoundingBoxAnnotatorが枠を作るクラスで、LabelAnnotatorがラベルを描画するクラスです。
YOLOv8の結果を、Detections.from_ultralytics(results)で変換して、その結果を表示しています。
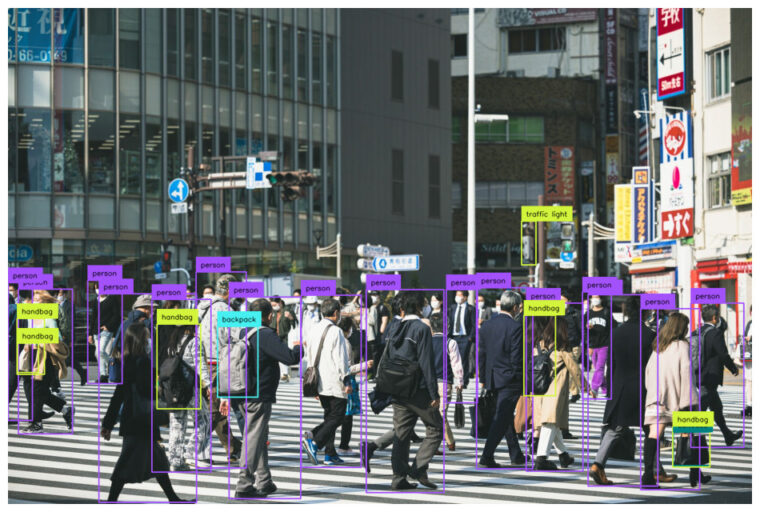
なお、クラス0(人物)だけを表示させる場合は以下のようにします。
detections = sv.Detections.from_ultralytics(results)
detections = detections[detections.class_id == 0]

image = cv2.imread("image.jpg")

bounding_box_annotator = sv.BoundingBoxAnnotator()
label_annotator = sv.LabelAnnotator()

labels = [
    results.names[class_id]
    for class_id
    in detections.class_id
]

annotated_image = bounding_box_annotator.annotate(
    scene=image, detections=detections)
annotated_image = label_annotator.annotate(
    scene=annotated_image, detections=detections, labels=labels)

sv.plot_image(annotated_image)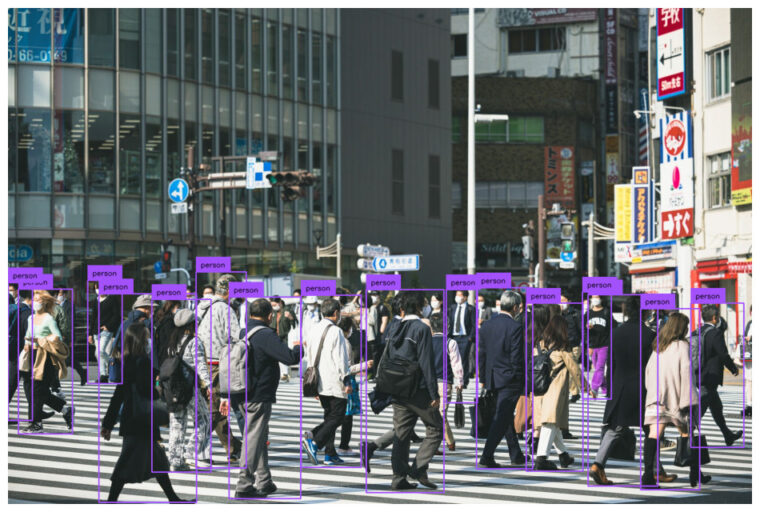
detections = detections[detections.class_id == 0]として、detectionsのうち、表示させたいものだけを抽出する形です。
配列の中から条件に合うものを取り出すので、色々応用が効きます。例えば、人物以外なら以下のようにします。
detections = sv.Detections.from_ultralytics(results)
detections = detections[detections.class_id != 0]

image = cv2.imread("image.jpg")

bounding_box_annotator = sv.BoundingBoxAnnotator()
label_annotator = sv.LabelAnnotator()

labels = [
    results.names[class_id]
    for class_id
    in detections.class_id
]

annotated_image = bounding_box_annotator.annotate(
    scene=image, detections=detections)
annotated_image = label_annotator.annotate(
    scene=annotated_image, detections=detections, labels=labels)

sv.plot_image(annotated_image)
他の条件でも選択することが可能です。例えば、予測した信頼度が0.5より大きなものだけ枠をつけたい場合には、以下のようにします。
detections = sv.Detections.from_ultralytics(results)
detections = detections[detections.class_id != 0]

image = cv2.imread("image.jpg")

bounding_box_annotator = sv.BoundingBoxAnnotator()
label_annotator = sv.LabelAnnotator()

labels = [
    results.names[class_id]
    for class_id
    in detections.class_id
]

annotated_image = bounding_box_annotator.annotate(
    scene=image, detections=detections)
annotated_image = label_annotator.annotate(
    scene=annotated_image, detections=detections, labels=labels)

sv.plot_image(annotated_image)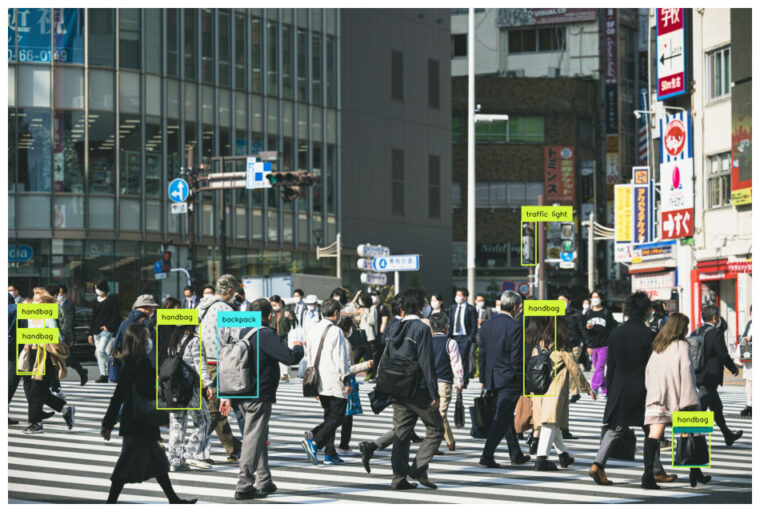
このように、簡単に結果を画像に重畳して表示させることが可能です。
セグメンテーションも同じ要領で、表示させることができます。ここでは、YOLOv8のセグメンテーションモデル(yolov8n-seg.pt)を使ってセグメンテーションを行いました。
import cv2
from ultralytics import YOLO
import supervision as sv


model = YOLO("yolov8n-seg.pt")
image = cv2.imread("image.jpg")
results = model(image)[0]
0: 448x640 17 persons, 2 backpacks, 3 handbags, 11.4ms
Speed: 2.8ms preprocess, 11.4ms inference, 3.0ms postprocess per image at shape (1, 3, 448, 640)予測は先ほどとほぼ同じなので簡単です。次に、セグメンテーションマスクを表示させます。こちらも、BoundingBoxAnnotatorをMaskAnnotatorに置き換えるだけです。
detections = sv.Detections.from_ultralytics(results)
image = cv2.imread("image.jpg")

label_annotator = sv.LabelAnnotator()
mask_annotator = sv.MaskAnnotator()

labels = [
    results.names[class_id]
    for class_id
    in detections.class_id
]

annotated_image = mask_annotator.annotate(
    scene = image, detections = detections)
annotated_image = label_annotator.annotate(
    scene=annotated_image, detections=detections, labels=labels)

sv.plot_image(annotated_image)
YOLOv8のセグメンテーションの出力は、多角形の頂点座標になっていますが、これをマスクデータに変換して重畳してくれます。
YOLOv8のセグメンテーションの結果を重畳するのは面倒(透過させるとかやると)なので、簡単にできるのは重宝しそうです。
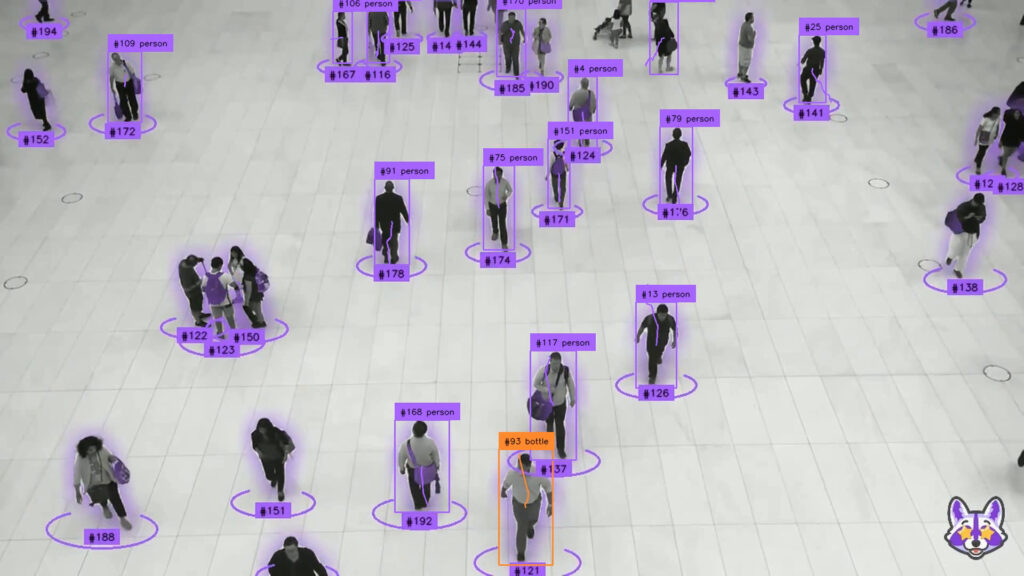
他にもいろいろ機能があります。例えば、動画に対して表示させるなども可能です。
そちらについては、公式ページを参照してください。
Github:https://github.com/roboflow/supervision
import numpy as np
import supervision as sv
from ultralytics import YOLO

model = YOLO("yolov8n.pt")
tracker = sv.ByteTrack()
box_annotator = sv.BoundingBoxAnnotator()
label_annotator = sv.LabelAnnotator()
trace_annotator = sv.TraceAnnotator()

def callback(frame: np.ndarray, _: int) -> np.ndarray:
    results = model(frame)[0]
    detections = sv.Detections.from_ultralytics(results)
    detections = tracker.update_with_detections(detections)

    labels = [
        f"#{tracker_id} {results.names[class_id]}"
        for class_id, tracker_id
        in zip(detections.class_id, detections.tracker_id)
    ]

    annotated_frame = box_annotator.annotate(
        frame.copy(), detections=detections)
    annotated_frame = label_annotator.annotate(
        annotated_frame, detections=detections, labels=labels)
    return trace_annotator.annotate(
        annotated_frame, detections=detections)

sv.process_video(
    source_path="sample.mp4",
    target_path="result.mp4",
    callback=callback
)
物体検出、セグメンテーションの結果を画像に重畳して表示させるツール”supervison”について解説しました。ビジュアライズは微妙に面倒なので、こういうツールがあるのは助かります。
torchvisionにも可視化ツールが準備されています。torchvisionでの可視化については以下の記事を参考にしてください(YOLOv8は”supervision”の方が使いやすいです)